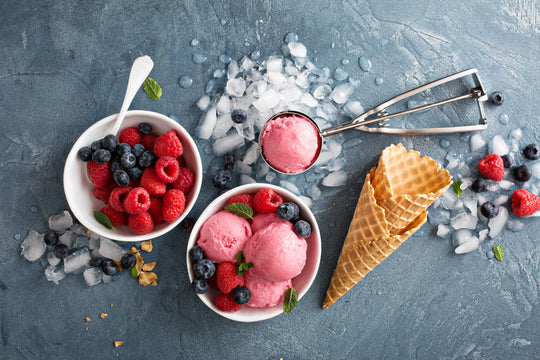
Who doesn’t love a good ol’ scoop ice cream, melting in the cone, on a hot summer day? It’s a treat that’s refreshing and delicious, and leaves you pining for more. Let’s delve into the history of ice cream and how it’s made- and then go ahead, get yourself a cone of yummy ice cream! Or, better yet, make your own healthy version at home- instructions can be found here.
The history of ice cream:
For those who think that ice cream is a modern invention, you’ve got another think coming. The origins of ice cream go back thousands and thousands of years ago. The first signs that ice cream existed date back to the founder of the Tang Dynasty in China, King Tang. King Tang had 94 “ice men” who would bring ice to the palace so a special dish named koumiss could be made.
 A little later in history, there are references that show that Alexander the Great enjoyed snow & ice flavored with honey and nectar. (How’s that for a sweet treat?)
 Photo Credit: Wikipedia
Further on, during the Roman Empire, Nero Claudius Caesar used to send men into the mountains to collect snow. This snow was layered flavored with fruits and juices. (There’s your proof that people had good taste, even though they lived so many years back!)
 Ice cream gained popularity in France during the 17th century. Charles I, the king of England at that time, loved when there were frozen desserts by his dinners and affairs. There are rumors that he did not want the recipe of the “creme ice” to fall into the hands of other royal families. Supposedly, he offered his chef £500 a year if he kept the recipe a secret. Some even say that he swore him to secrecy, on the account of pain by death if the recipe would be revealed. Once he was executed, there was no need to keep the recipe a secret, so it spread throughout Europe.
Even later on, in more modern history, there were reports of presidents and leaders that simply adored this cool treat, and would go to any lengths to get it.
There are records from a merchant in New York that show that President George Washington spent around $200 for ice cream in the summer of 1790. That’s the equivalent of $5,758.20! (Let’s set up a country, let’s eat ice cream. Let’s write a constitution, let’s eat ice cream.) After his death, there was an inventory count of the goods in Mount Vernon, which included 2 pewter ice cream pots.
 Photo Credit: All Things Liberty
The process of ice cream making:
Sounds simple enough- blend some ice, add some flavoring, throw in some chocolate chips, and presto! Ice cream! Not so quick… The process of ice cream is a bit longer and more complex than that. Let’s see what the steps are.
- Blending the Mixture When the milk arrives at the ice cream plant, it is pumped into cold storage silos, so that it retains its freshness. Pipes then bring the milk into big stainless steel blenders, where it gets blended for a couple of minutes with various other ingredients, such as eggs, sugar and other additives.
-
Pasteurizing the Mixture
 Once the milk has been blended, it is then piped to a pasteurization machine. This ensures that any existing bacteria gets killed. This happens because the cold, milky mixture is mixed with hot water, which the bacteria can’t withstand.
 -
Homogenizing the Mixture The fat particles in the milk mixture tend to separate from the rest of the mixture, just like oil and water will separate even when you mix them together. In order to avoid that from happening in the ice cream, the warm mixture is forced through a small opening into the homogenizer. This will break down the fat particles into even smaller particles, so that they don’t separate from the rest of the mixture.
-
Cooling & Resting the Mixture What a journey the milk has taken so far! The mixture is now piped back to the pasteurized where it’s mixed with cold water. This cools the mixture. The mixture is then pumped to temperature controlled tanks, where it rests (or ages, as it is also called) for 4-8 hours, in order to allow the ingredients to blend. (If I’d be resting 4-8 hours with ice cream around me, there’d be nothing left!)
-
Flavoring the Ice Cream
 This has got to be the most fun part! The ice cream mixture is now sent to big vats and different flavorings are piped into the vats. Only liquid ingredients are added so that the mixture goes smoothly through the freezing process (next step). The mixture is now blended again, so that the milk mixture and flavorings, well, blend!
 -
Freezing the Ice Cream The ice cream mixture is pumped into freezers, where the temperature can be anywhere as low as -40°F(-40°C). Liquid ammonia is used as a freezing agent. In order to get it to a soft-serve consistency, air is pumped into it while it freezes.
-
Adding Bulky Flavoring to the Ice Cream At this point, additionally bulky flavorings are added to the mixture. This includes pieces of fruits, chocolate chips, cookie chunks and candy pieces. The chunks are dropped into the ice cream according to predetermined amounts. The ice cream is then blended again so that the chunks are distributed evenly throughout the ice cream.
-
Packaging the Ice Cream
 Filling machines will now drop a premeasured amount of ice cream into the cardboard tubs (that are held in holders, so that it should maintain its shape). Once it’s filled, the machine will place a lid onto all cartons, and push it further along the conveyor belt. In many places, the cartons are now stamped with the expiration date and product code.
 -
Hardening the Ice Cream Before it can get stored and/or shipped, the ice cream needs to be hardened. The ice cream cartons are moved to a “tunnel”. Turning ceiling fans will create a wind chill, and the contents in the tubs will become solid. Then the cartons are stored in refrigerated warehouses until they get shipped.
(Watch ice cream production in factory)
And then, finally!, the ice cream reaches a shop near you, and you get to indulge in yummy goodness!
So, what do you say to some ice cream?


