Understanding the Basics of S'mores
What are S'mores?
If you have never had the pleasure of indulging in a s'more, let me introduce you to this delightful dessert. A s'more is a classic campfire treat made with just three simple ingredients: graham crackers, chocolate, and marshmallows. When combined, these humble ingredients create a harmonious blend of flavors and textures that will leave you craving more. Legend has it that the name "s'more" is a contraction of the phrase "some more," as in "I want some more of that delicious treat!" The origins of the s'more can be traced back to the early 20th century, making it a beloved tradition that has stood the test of time.The Essential Ingredients for S'mores
Before we dive into the process of making s'mores, it's important to gather all the necessary ingredients. You will need:- Graham crackers: These crispy, honey-flavored crackers serve as the base for your s'mores.
- Chocolate bars: Choose your favorite brand and type of chocolate. Whether you prefer milk, dark, or even a flavored variety, the choice is yours.
- Marshmallows: Opt for large marshmallows, as they are easier to handle and melt to a gooey perfection.
Preparing Your S'mores Station
Choosing the Right Location
The first step in creating the perfect s'mores is finding the ideal location. While the traditional setting may be around a campfire, you can also adapt this delightful treat to be made indoors using other heat sources, like a fireplace or stovetop. Just ensure that you have a safe and controlled environment for your s'more-making adventure. When selecting the perfect location for your s'mores station, consider the ambiance and atmosphere you want to create. If you opt for a campfire outdoors, think about the crackling sounds of the wood and the warmth of the flames adding to the experience. On the other hand, an indoor setting with a fireplace can provide a cozy and intimate setting for enjoying s'mores with loved ones on a chilly evening.Gathering Your Tools and Equipment
Now that you have settled on a location, it's time to gather your tools and equipment. Here's what you'll need:- Long skewers or metal rods: These will be your trusty utensils for toasting the marshmallows to golden-brown perfection.
- A heat source: Whether it's a campfire, fireplace, or stovetop, make sure you have a reliable and heat-safe way to cook your s'mores.
- Plates and napkins: Essential for mess-free enjoyment and quick clean-up.
Step-by-Step Guide to Making S'mores
Preparing the Marshmallows
Once your station is set up, it's time to start making s'mores! Begin by skewering a marshmallow onto the end of a long skewer or metal rod. Hold the marshmallow over the heat source, rotating it slowly to ensure even cooking. Keep a close eye on the marshmallow as it can quickly go from golden brown to charred. Once it reaches your desired level of toasting, remove it from the heat source and set it aside. It's important to note that the art of toasting a marshmallow is a skill that requires patience and precision. The ideal marshmallow is evenly golden brown on the outside, with a warm and gooey center. Some people prefer a quick toast for a slightly crispy exterior, while others enjoy a slow roast for a soft and melty inside.Assembling the S'mores
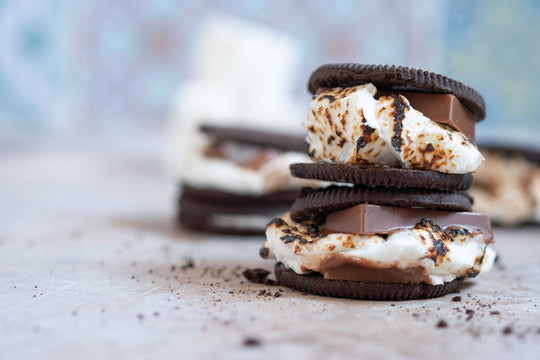
Now comes the fun part - assembling your s'mores! Take two graham crackers and break them in half to create four squares. Place a piece of chocolate on one of the graham cracker squares. Then, carefully slide the toasted marshmallow off the skewer and onto the chocolate. Finally, top it off with another graham cracker square to complete the sandwich. The beauty of a s'more lies in its simplicity and versatility. While the classic s'more consists of graham crackers, chocolate, and marshmallows, feel free to get creative with your ingredients. Try using different types of chocolate, flavored marshmallows, or even swapping out the graham crackers for cookies for a unique twist on this timeless treat.Perfecting the Melting Process
To achieve the perfect melting consistency, allow the warmth of the marshmallow to melt the chocolate. Press the top graham cracker gently down, causing the marshmallow to spread and the chocolate to melt further. The result should be a delightful blend of melted chocolate and gooey marshmallow. Remember, the key to a well-made s'more is balance. You want just the right amount of heat to melt the chocolate without turning it into a gooey mess. By mastering the art of timing and temperature control, you can create the ultimate s'more experience that will leave you craving more.Tips for S'mores Perfection
Avoiding Common S'mores Mistakes
While making s'mores is simple, there are a few mistakes to avoid. First, don't rush the toasting process - take your time to achieve that golden-brown goodness. Remember, the key to a perfect s'more is patience. Allow the marshmallow to slowly caramelize to a beautiful golden hue, ensuring a gooey center with a hint of charred flavor. Additionally, be mindful of the type of chocolate you choose. Opt for chocolate bars with a high cocoa content, as they not only melt more easily but also provide a richer flavor profile, complementing the sweetness of the marshmallow. Another crucial aspect to consider is the quality of your graham crackers. While the focus is often on the marshmallow and chocolate, the graham cracker plays a vital role in providing that satisfying crunch and hint of honeyed sweetness. Choose a sturdy graham cracker that can hold up to the gooey marshmallow and melted chocolate without becoming soggy, ensuring each bite is a delightful balance of textures.Creative Variations on the Classic S'more
If you're feeling adventurous, why not experiment with different variations of the classic s'more? Elevate your s'mores game by using flavored marshmallows such as raspberry, toasted coconut, or even espresso for a unique twist on the traditional treat. Additionally, consider adding a generous spread of peanut butter or Nutella before sandwiching the marshmallow and chocolate between the graham crackers. The creamy nuttiness of peanut butter or the decadent richness of Nutella will add a luscious layer of flavor to your s'more, making each bite a truly indulgent experience. For those looking to completely reinvent the classic s'more, think outside the box when it comes to the base. Swap out the traditional graham crackers for other cookies or biscuits such as shortbread, chocolate chip cookies, or even cinnamon graham crackers. Each alternative base will bring its own unique flavor profile to the s'more, allowing you to customize your creation to suit your taste preferences. Get creative with your s'more ingredients and let your imagination run wild as you explore the endless possibilities for this beloved campfire treat.Safety Precautions When Making S'mores
Fire Safety Guidelines
If you're making s'mores around a fire, it's crucial to prioritize safety. Make sure there is enough clearance around the fire and keep a bucket of water or fire extinguisher nearby. Never leave the fire unattended, and supervise children closely. Remember, safety first!Food Handling and Hygiene Considerations
When preparing and enjoying s'mores, it's essential to maintain proper food handling and hygiene practices. Wash your hands before and after preparing your s'mores. Ensure that your utensils and station are clean, and be mindful of any food allergies or dietary restrictions. Now that you have the knowledge to create the perfect s'mores, it's time to gather your friends and family, set up your s'mores station, and enjoy the incredible combination of graham crackers, chocolate, and marshmallows. So go ahead, take a bite, and savor the sweetness of this beloved treat. Happy s'more-making!Join the Baketivity Family for More Sweet Adventures
Ready to take your love for s'mores and baking to the next level? Join the Baketivity Baking Club and create unforgettable moments with your loved ones. Our baking kits, infused with creativity and quality, are perfect for family bonding and educational fun. With Baketivity, you'll have everything you need to bake up delicious memories. Don't miss out on the joy of baking together – join the club today and let the sweet times roll!


